Cross Stitch Star Trek TNG Dolls

11 Jan

Image

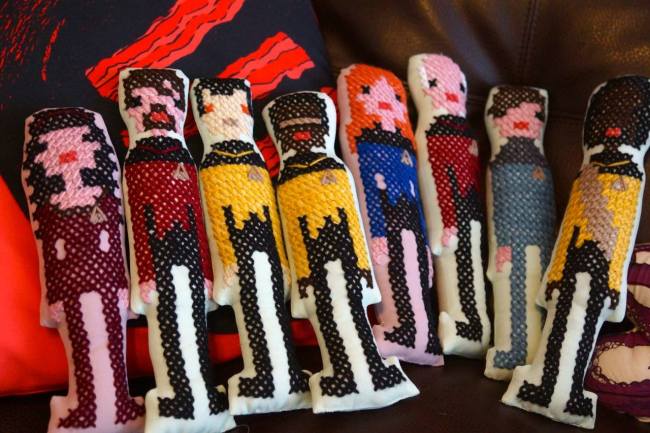
I made these cross stitch Star Trek TNG dolls as a Christmas gift for my sister.  She appreciates such things, so tends to net a fair amount of handmade whatnots from me.

I used a cross stitch pattern from weelittlestiches, so they deserve all of the credit.

We watched a lot of TNG growing up.  So much so that if you look back on the history of all the dudes I had crushes on during my youth, 75% of them were Riker types. (My husband is a Jewish Riker type). The other 25% were Christopher Plummer types, which is why this Sound of Music pattern is in my queue.  I just wish it included Rolf, who is the Wesley of that particular film.

Anyhoo, the Star Trek dolls were simple but time consuming.  Like, on the Duke Sweet scale, I would score it as a “could be done whilst vastly intoxicated” level of simple and  a “Waterworld” level of time consumption.  That’s 135 minutes per doll.
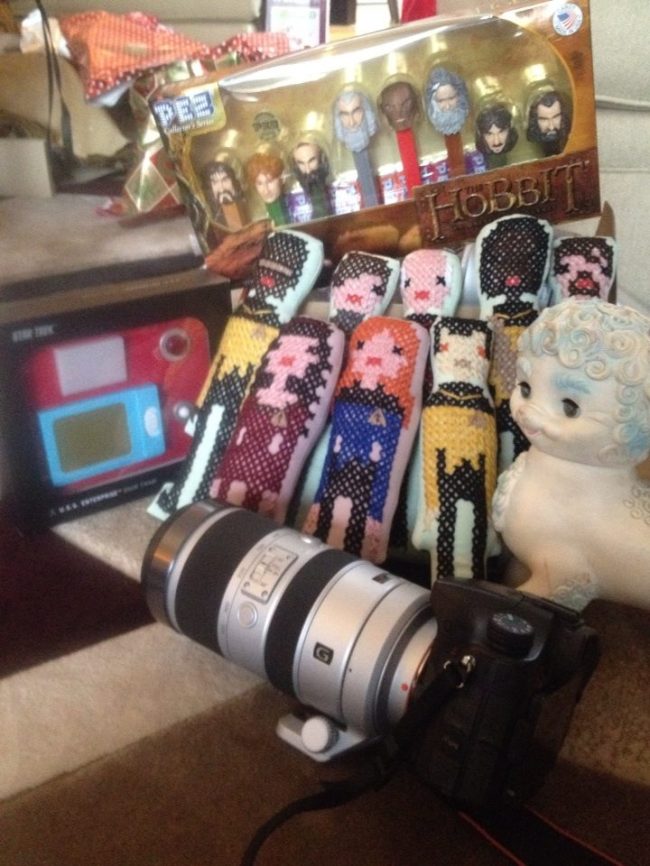
ImageHere’s another picture my sister took.  This shows the entire gift, which also included a “nightmare lamb” (the key to its creepiness is the eyebrows) and various nerdy things.

To increase the scale of the stitches, I used monk’s cloth instead of Aida cloth and  yarn instead of embroidery floss.  There is a good tutorial here that explains how to do it.  I only made two changes:

  1. I removed the monk’s cloth after I finished stitching (the strands pull away easily).  Dunno, it just looked better that way, not to mention it was super satisfying to rip it out.  I think the monk’s cloth Good Knits used was more stable than mine, because mine was slip-sliding all over the place despite basting it.
  2. I made my dolls “taller”. If you look closely at monks cloth, you’ll see the “squares” formed by the weave are not perfectly equal in length and height.  This means the doll will end up with different dimensions depending on how you place the design.  I tried it both ways and preferred placing the design “sideways” to make the dolls look stretched out in height.  If you do it the other way, the characters will look shorter/wider.

Well, we covered a lot of ground today.  Bye.
When you’re holding a drill . . .

2 Jul

On Friday, I rediscovered JB’s electric drill and spent the rest of the afternoon walking around, the weight of the drill heavy in my hand, looking for things to drill for fun.  This was when my ill-fated Pyrex drilling idea was formed.

Our Pyrex collection is only curated by cheapness, so we have a mishmash of different patterns including some from the late 70s/early 80s that I’m not as enamoured with. So standing in front of our Pyrex-filled hutch, I got to thinking… how do you take a moderately rad Pyrex bowl and bedazzle it with awesomeness?  The answer wasn’t immediately clear, but I was completely certain it would involve drilling.

Later that day I decided that I needed to drill some holes in some ceramic pots I found in the basement, and the idea came to me – I would make a Pyrex plant holder.  A macraméd plant holder suddenly seemed lame compared to one that had holes drilled  in it.

So this was my idea… take a set of stacking Pyrex bowls, drill three holes into each of them, string the bowls together with chains and hooks, hang and enjoy.   Kind of like this hanging fruit thingy:

I couldn’t find any info online about how to drill a hole in a Pyrex bowl specifically, so I figured the next best thing was to identify what Pyrex bowls are made of, then find a tutorial for drilling through it.  To that end, Google revealed an amazing fact… Pyrex bowls are made of Pyrex!   And more generally speaking… glass.

So, I decided to follow a tutorial for drilling through glass.  It said to use either a carbide bit or a diamond bit.  The diamond bit was surprisingly cheaper, but Home Hardware only had diamond bits in large sizes, so I picked up the carbide bit and literally ran home to try it, giggling with glee.

This was the outcome:

I first tried drilling through the bottom of the dish, which worked out ok – however, pieces of the bit flaked off as it started to pierce through to the other side and a fracture line appeared in the Pyrex.

Next, I tried drilling a hole about 3/8” away from the lip of the dish (which is what I’ll need to do to make the planter), and that resulted in almost instant cracking.  I made a few more attempts using the shards—going slower and using masking tape—but all efforts failed!  Probably because by that point, the bit looked like this:

Luckily, I conducted the experiment using a super hideous casserole dish that I will not miss.

Anyway, as much as I hate craft failures, my urge to drill things is still very strong, so I might make another attempt using a diamond bit.  In the meantime, I moved some of the supurfluous Pyrex bowls onto this rad shelf I got for $8 at the Museum of Transportation’s flea market.

And PS I was lying about running – it was really hot out.  I drove home, collapsed on the couch for an hour and ate like seven freezies.

The Mini Kitchen Simulator

24 Jun

I bought a retro kitchen play set for 8 bones!

I’ve been calling it the “Mini Kitchen Simulator”.  If you’ve ever wondered what it would be like to cook with tiny, defunct appliances, my mini kitchen will simulate the experience for you.

Here are the burners up close.  Stay back, they’re hot!

We don’t have kids, so this is one of those questionable purchases that might end up in the basement. But at the time, the only thought running through my head was, “FINALLY, AN EXCUSE TO MAKE FELT FOOD!”

For now, the mini kitchen simulator is sitting in our dining room and George has been hanging out in the space where the skink should be.  This scene needs a mini frying pan and mini trout.

Anyway, my mini kitchen simulator is in bad shape, but it has lots of potential.  It’s solid wood, and although it was probably made later, the hardware is from the 50s.  Sanding the shit out of it would be a good start. Then some new paint (pistachio colour?), a new sink/faucet, and possibly a back splash that could include a teeny window and shelf.  That’s right, I can use the mini kitchen simulator to achieve all of my unfulfilled retro kitchen desires.

I have a lot of good memories playing house with my kitchen play set and plastic food.  This is the play set I grew up with:

The coolest part was the coffee maker—you could pour water into the upper container and dispense it into your coffee pot.  I thought water was a pretty lame decoy for real coffee, so I remember making up some kind of juice, glue, and black paint cocktail and fucking up that coffee maker beyond repair.

Anyway, once my mini kitchen has been retrofitted, I think we should all put on mini aprons, break out the mini highball glasses, and have a drunken game of house.

Macramé Hang-Ups

17 Jun

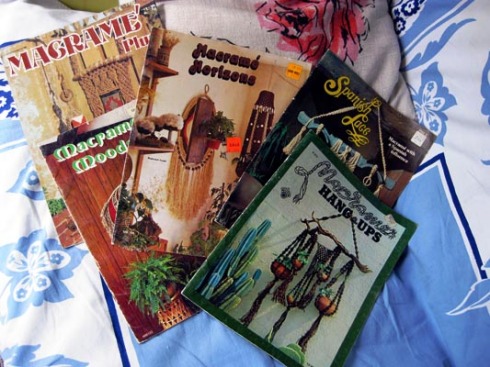
I’d like to add some plants to our front porch/“catio”, and since our patio furniture has a 70s vibe, I’ve been searching for a good macramé hanging plant holder. I used to see them all the time, but now that I actually want one, the thrift and yard sale world is withholding.  I did find some macramé pattern booklets though, so perhaps I’ll make my own!

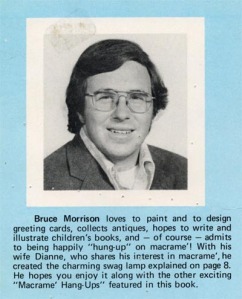
I got these booklets at Full Circle in Harrow along with a bunch of sewing magazines and a vintage tablecloth for $2.00.  My favourite is called Macramé Hang-Ups circa 1973.  It was put together by a dude named Bruce Morrison who is allegedly “hung-up on macramé”.

Dudes like macramé too! I picture Bruce and Dianne gettin’ notty by the fireplace.

Bruce’s booklet has directions for two illuminated macramé “decorator accents”, including this one called “Night Song” which is described as an, “impressive pool side lamp and flower holder.”  Impressive indeed Bruce!

As a side note, Bruce is a name I once had on my super-secret future child name list, but JB was like, “NO CHILD OF MINE WILL BE NAMED BRUCE.” I wonder if knowing that a Bruce authored a hella rad 70s macramé book would change his mind?

Anyway, Macramé Hang-Ups contains many great philosophical truths including this snippet explaining how macramé ALWAYS HAS BEEN AND ALWAYS WILL BE.   FOREVER AND EVER.

The extra “then” is either for extreme emphasis or a typo. Only Bruce knows.

One last thing about Macramé Hang-Ups.  Check out the many levels of awesomeness in this picture of Bruce’s “Aquitaine” creation:

Observe: (1) goldfish in a tiny tepid pool; (2) discus trophies which explain how Bruce got the upper arm strength required for excessive macramé knotting sessions; and (3) amazing Napoleon plush that I would give up my first-born Bruce for.  Seriously, I wish this booklet had the pattern for it, ‘cuz it’s amazing.

Spanish Lace: Macramé with a Spanish Influence by Pat Brown circa 1976 is also pretty entertaining.   I am not sure I see a Spanish influence in the project below, but I like to imagine that  Pat’s children are half Mexican.

Are there half Mexican twins here, or is the one kid loved twice as much?

To close my post about macramé, I’d like to introduce you to the “Foxy Lady Bath Swag” (yes, that’s the actual name of the pattern) from Macramé Moods.  Nothing is foxier than a fuzzy yellow toilet lid cover.  The placement of the fern is odd – is the idea that it would gently tickle your soft bits while you pee?  Foxy.

Seriously though, macramé is rad and seems about due for a come back.  I could see the Foxy Lady Bath Swag in the Anthropologie catalogue – just add excessive photo filers and some ikat crap interspersed.